


How to Make Personalized Christmas Cards
Christmas is one of the most important holidays for us and it isn't complete without personalized Christmas cards. Custom Christmas cards, as typical Christmas gifts, could be something fairly endearing and unforgettable. Do you get any idea to make your own Christmas cards to remember this joyful holiday?
In this article, I will show you how to make personalized Christmas cards with the easy photo card maker - FotoJet - to spread the holiday cheers. FotoJet offers you two ways to make your own Christmas cards. Once you click Get Started button on the homepage, you will see the TEMPLATE mode and CLASSIC mode in next page.
Quick & Easy TEMPLATE Mode
To make it simpler and quicker, you can simply choose the TEMPLATE mode to continue your editing. Quickly browse the huge selection of templates and choose your desired Christmas card template. When entering to the editing mode, just change the text properties like font, style, color, size, alignment, etc. In terms of photo, you can zoom, flip, rotate, apply photo filters and adjust the color of your photos using the color adjustment tools like Exposure, Brightness, Contrast, Saturation and Hue. Everything can be done extremely easy with its straight forward user interface.

Fully Customizable CLASSIC Mode
Today, we are going to concentrate on the CLASSIC mode. If you don't want to use the preset templates, choose the mode of CLASSIC and you will be amazed by its powerful features and abundant art resources.
Step 1. Choose a Layout
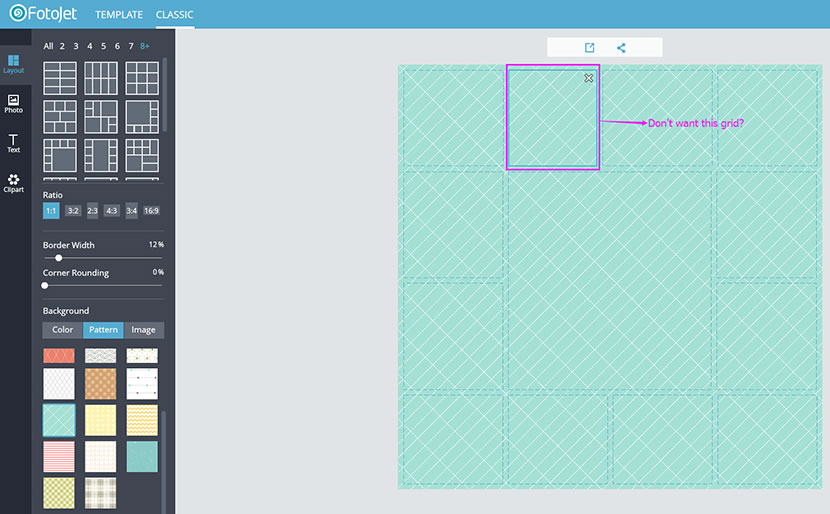
After entering this mode, you will be greeted by many preset layouts. Choose one you like to begin your Christmas card. You are able to adjust the ratio of your card using the many common ratios provided. Under the layout tab, you can also adjust its border width, corner rounding and set its background with three options of Color, preset Pattern and your own Image. If you choose a layout but think some of its grids want to be removed. Just select it and click the “cross” on its right top to delete the grid.
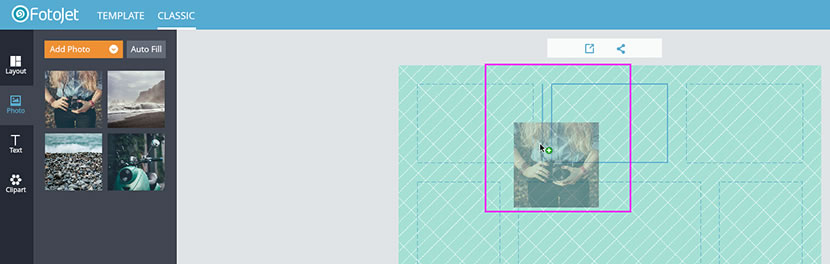
Some of you may wonder if you can add one more grid into the layout. Surely, yes. Just switch to Photo tab and drag a photo and drop it to where you want to add your grid. You can see there is a blue line between the two grids and you can also see a little cute “+” icon beside the mouse pointer.
Step 2. Use Your Own Christmas Photos
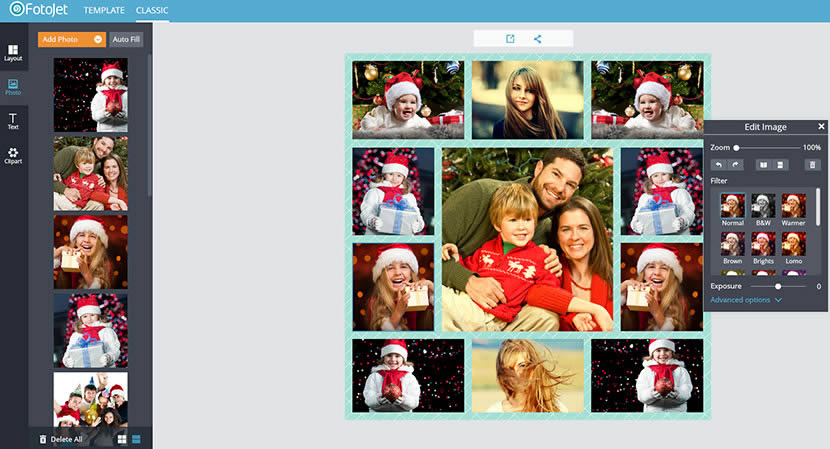
FotoJet preset 4 photos displayed in the photo list. To make your Christmas card unique and meaningful, you should always use you own Christmas photos. Click Add Photo button, you will be given the options to add photos from local computer folders or from Facebook albums.
According to your needs, you can make some adjustments then by changing the photo list displaying mode, zooming, rotating, flipping as well as the color adjustments under the TEMPLATE mode.
Step 3. Add Text Captions
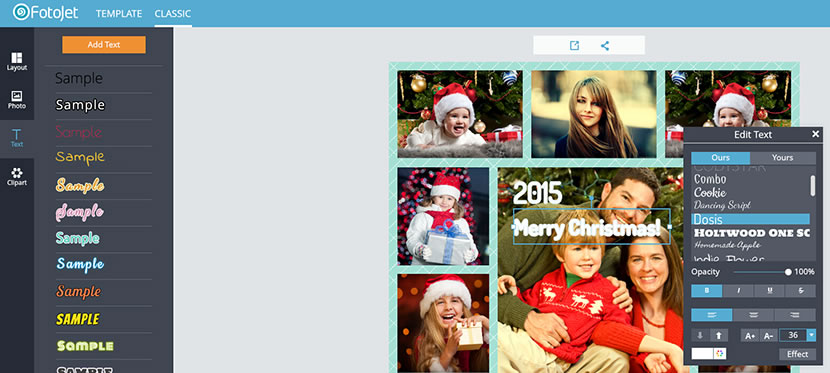
Next step, add some text captions to express your excited feelings. You can fully customize the text position by dragging and dropping, apply text style from the sample text or using the options in the floating panel to make it.
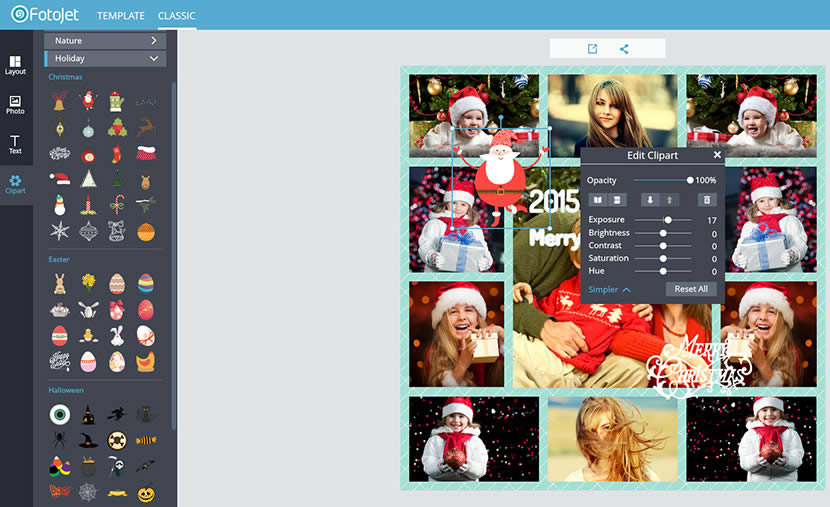
Step 4. Make Your Own Christmas Cards with Cute Clipart
Let's go to the next tab Clipart to add embellishments. From the various categories, you will find one or two clipart for your custom Christmas cards. Moreover, you can adjust the properties of a clipart like a photo.
Step 5. Export Christmas Cards
Once everything looks great, save it to your computer or share it to your Facebook. It's obvious to see the save and share buttons in the middle at the top of the page.
Delivering the warmth of the season to friends and family with personalized Christmas cards will never go out of vogue. Are you ready to make your own one? Let's get started now!
Make Personalized Christmas Cards Now
Try it for free, no download or registration required.
Get Started


 128 Bit SSL Secure Checkout

